Do you have your Mother's Day gift picked out yet? I was scrambling a little bit until today, some of my supplies for my DIY gift didn't arrive until last night, wasn't sure if I was going to end up empty handed. But...crisis averted I got the goods and whipped up these li'l cuties.
This was a super easy DIY project; I personalized it by choosing paper shades and patterns that go with my MIL's decor, and picked herbs that I thought she would use in some of her favourite dishes.
- empty tin cans, washed and dried
- herb plants of your choice (I went right for the plants that were already in bloom, no patience to wait on seeds)
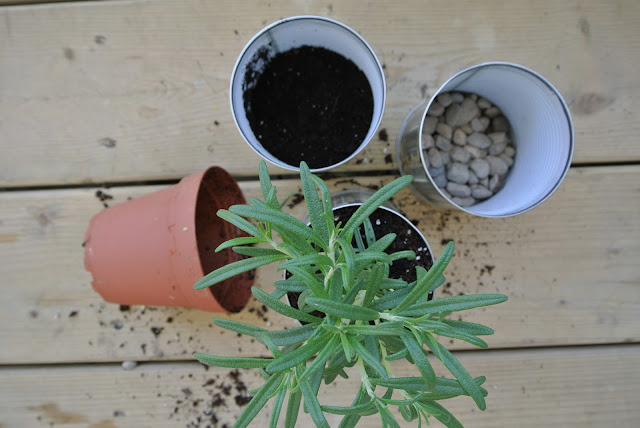
- potting soil and pea gravel
- shovel and garden gloves (if you're like me and want to protect your mani)
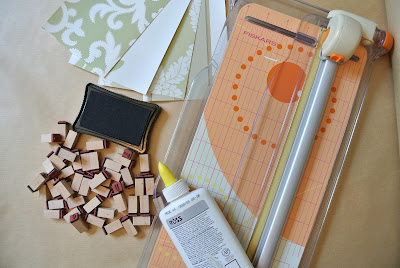
- glue, paper trimmer, stamps, ink pad and kraft paper
- wallpaper samples - these can be left over from an old project or ordered online. I used Lowes Wallpaper Studio .
 |
| Indoor tools |
 |
| Outdoor tools |
I took the cans and filled the bottoms with a layer of pea gravel to allow drainage; then I added 1 scoop of the potting soil (I didn't need a lot since the herbs came in dirt). I took the herbs out of the pots they came in and broke up the dirt with my hands, then placed them in the tin canand packed them down. That's it! Ridiculously simple right?
Then on to the fun part, I'm certainly not a gardenista, I'm a crafter, so I was ready to move on at this point. I used the paper trimmer to cut the wallpaper to fit on the can (there are 2 small lips at the top and bottom of the can, I found it easier to make the paper fit inside those rather than cover them). Once the paper was cut I wrapped it around the can and added a bead of glue along the seam and glued paper to paper ( I didn't glue it to the can). I decided to glue the paper on to the tin after the planting process because I didn't want the dirt to spill down the side and ruin the wallpaper.
Now they were ready to be labeled, I thought stamping the herb names would be a nice rustic, casual detail. I had these stamps lying around from our wedding; yes, I hand stamped each menu card - believe me that's not even the tip of the insanity iceberg when it comes to our wedding prep, but that's for another day.
I used an elastic band to keep the letters tight together, for the wedding I used tape, both worked fine. Just dab on the ink pad, line it up and let it go! I repeated the glue step; wrapped the belly band around the tin and glued paper to paper - I aligned the seams to keep the look clean - but this time I glued the kraft paper to the wallpaper so the band wouldn't slide down.
Yipeee, I think they are pretty darn adorable and the smell has me salivating. Here's hoping my MIL enjoys them and most importantly, that they survive . Enjoy your Mother's Day!
Time: 1.5 hours
Difficulty Level: 4/10
Cost: $30


Love this idea! And great work with the well-written, detailed instructions ;)
ReplyDeleteThanks, it's fun and easy, even for a brown thumb like me
ReplyDeleteGreat idea! "Uptown" chic while recycling!
ReplyDeleteImpressive and powerful suggestion by the author of this blog are really helpful to me. Gardening tools.
ReplyDeleteI thoroughly enjoyed your article on the gardening tool you covered. Your detailed examination of its features and benefits was very insightful. I also wanted to mention that the handy fogging machine is another tool that has made a huge difference in my gardening experience. Its efficiency and ease of use are unparalleled. Your article has inspired me to explore more tools to improve my garden. Thanks for the great read!
ReplyDeleteThiis is a great post
ReplyDelete